HelloWorld with CMake
Time to Complete: 8 mins
- GOALS:
Compile with CMake
Learn typical build patterns
Use flags to enable different capabilities
This tutorial will walk through the steps involved for building the AMReX HelloWorld
example with CMake. Essential elements of the Git process and the HelloWorld source code
were discussed briefly in HelloWorld with GNU Make and will not be repeated here.
We will work in the same,
amrex-tutorials/GuidedTutorials/HelloWorld/ directory.

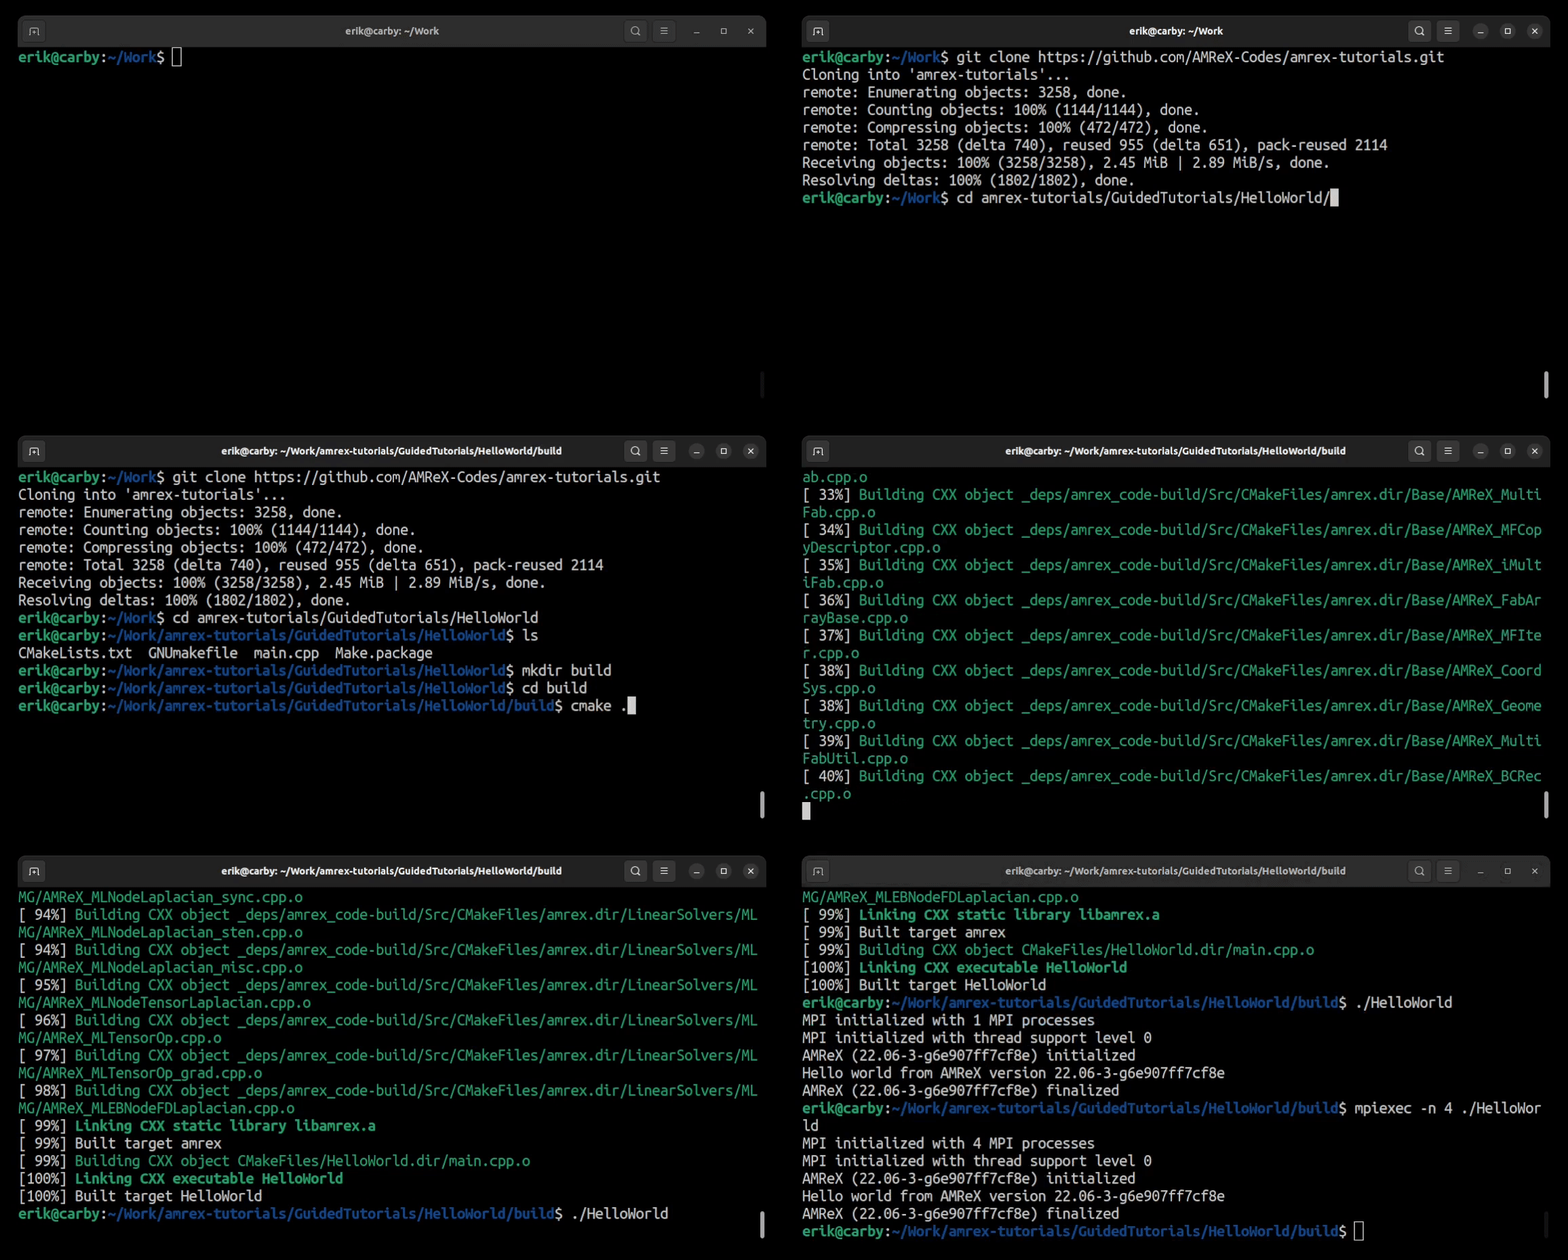
Animation showing how to build the HelloWorld example with CMake.
Getting the Code
When CMake compiles the HelloWorld source code it will look for an AMReX source code directory.
If it does not find one, it will download the development branch of AMReX
from Git and store it in its own files of dependencies. Therefore for this example, we
need only git clone the amrex-tutorials repo. To do this, in terminal we type:
git clone https://github.com/AMReX-Codes/amrex-tutorials.git
Compiling the Code with CMake
In the amrex-tutorials directory that we created, navigate to the Guided Tutorials
HelloWorld example at amrex-tutorials/GuidedTutorials/HelloWorld/. In the
directory, we should see the file CMakeLists.txt. This is the file that
CMake needs to configure and compile the code.
Compiling with CMake requires several steps:
Create a build directory and enter it.
Call CMake to configure the HelloWorld project for compilation.
Compile the code.
In the terminal, the commands are:
mkdir build
cd build
cmake ..
cmake --build . -j8
Using a build directory (aptly named “build” in this example) is done so that our code is compiled in a directory completely separate from our source code. That way if we are unhappy with our build parameters or run into other issues, we can simply delete the entire build directory and start again.
A comment on the -j8 flag:
The -j8 flag tells CMake to compile the code using 8 processes. To compile
with more or less processes, change the value of 8.
At this point, CMake should have successfully compiled our HelloWorld executable.
Running the HelloWorld Executable
To run the HelloWorld example type,
./HelloWorld
The output should be:
MPI initialized with 1 MPI processes
MPI initialized with thread support level 0
AMReX (22.06-7-gff9e832483f1) initialized
Hello world from AMReX version 22.06-7-gff9e832483f1
AMReX (22.06-7-gff9e832483f1) finalized
To run with 4 MPI processes, we write:
mpiexec -n 4 ./HelloWorld
Compile Configurations with CMake
Notice that in our example, CMake decided to compile an MPI-enabled
version of our code by default. This default preference is set in
the AMReX CMake source code. If we want to compile a version of
HelloWorld without MPI, we need to give the commands during
the configuration step. In the following text, we will describe
the steps for doing this.
First, we want to make a new build directory to hold our separate
non-MPI build. Return to the amrex-tutorials/GuidedTutorials/HelloWorld/
directory with our source code and
CMakeLists.txt file. Then create a new build directory and
enter it. I will call the new build directory, “build_nompi”.
mkdir build_nompi
cd build_nompi
This time when we call cmake .. we will pass a flag to turn
off MPI. To do this, type:
cmake .. -DAMReX_MPI=NO
With this line, CMake will configure the compilation not to enable MPI. Now type,
cmake --build . -j8
to compile the code. After compilation, when we run HelloWorld
we should get an output like,
AMReX (22.06-7-gff9e832483f1) initialized
Hello world from AMReX version 22.06-7-gff9e832483f1
AMReX (22.06-7-gff9e832483f1) finalized
that shows this code was not MPI enabled.
CMake Configuration Options
As with GNU Make, there are many compilation options to choose from when using CMake. For a complete list, see Customization Options in the AMReX User’s Guide.
Note
A common mistake when passing flags in CMake is to forget to use a lower case “e” in the flags. So it should be “-DAMReX” not “-DAMREX”.